The Signing Designer
The Signing Designer
The Designer is where you place fields onto the source PDF - open it from a request via Frappe Sign -> Open Designer.
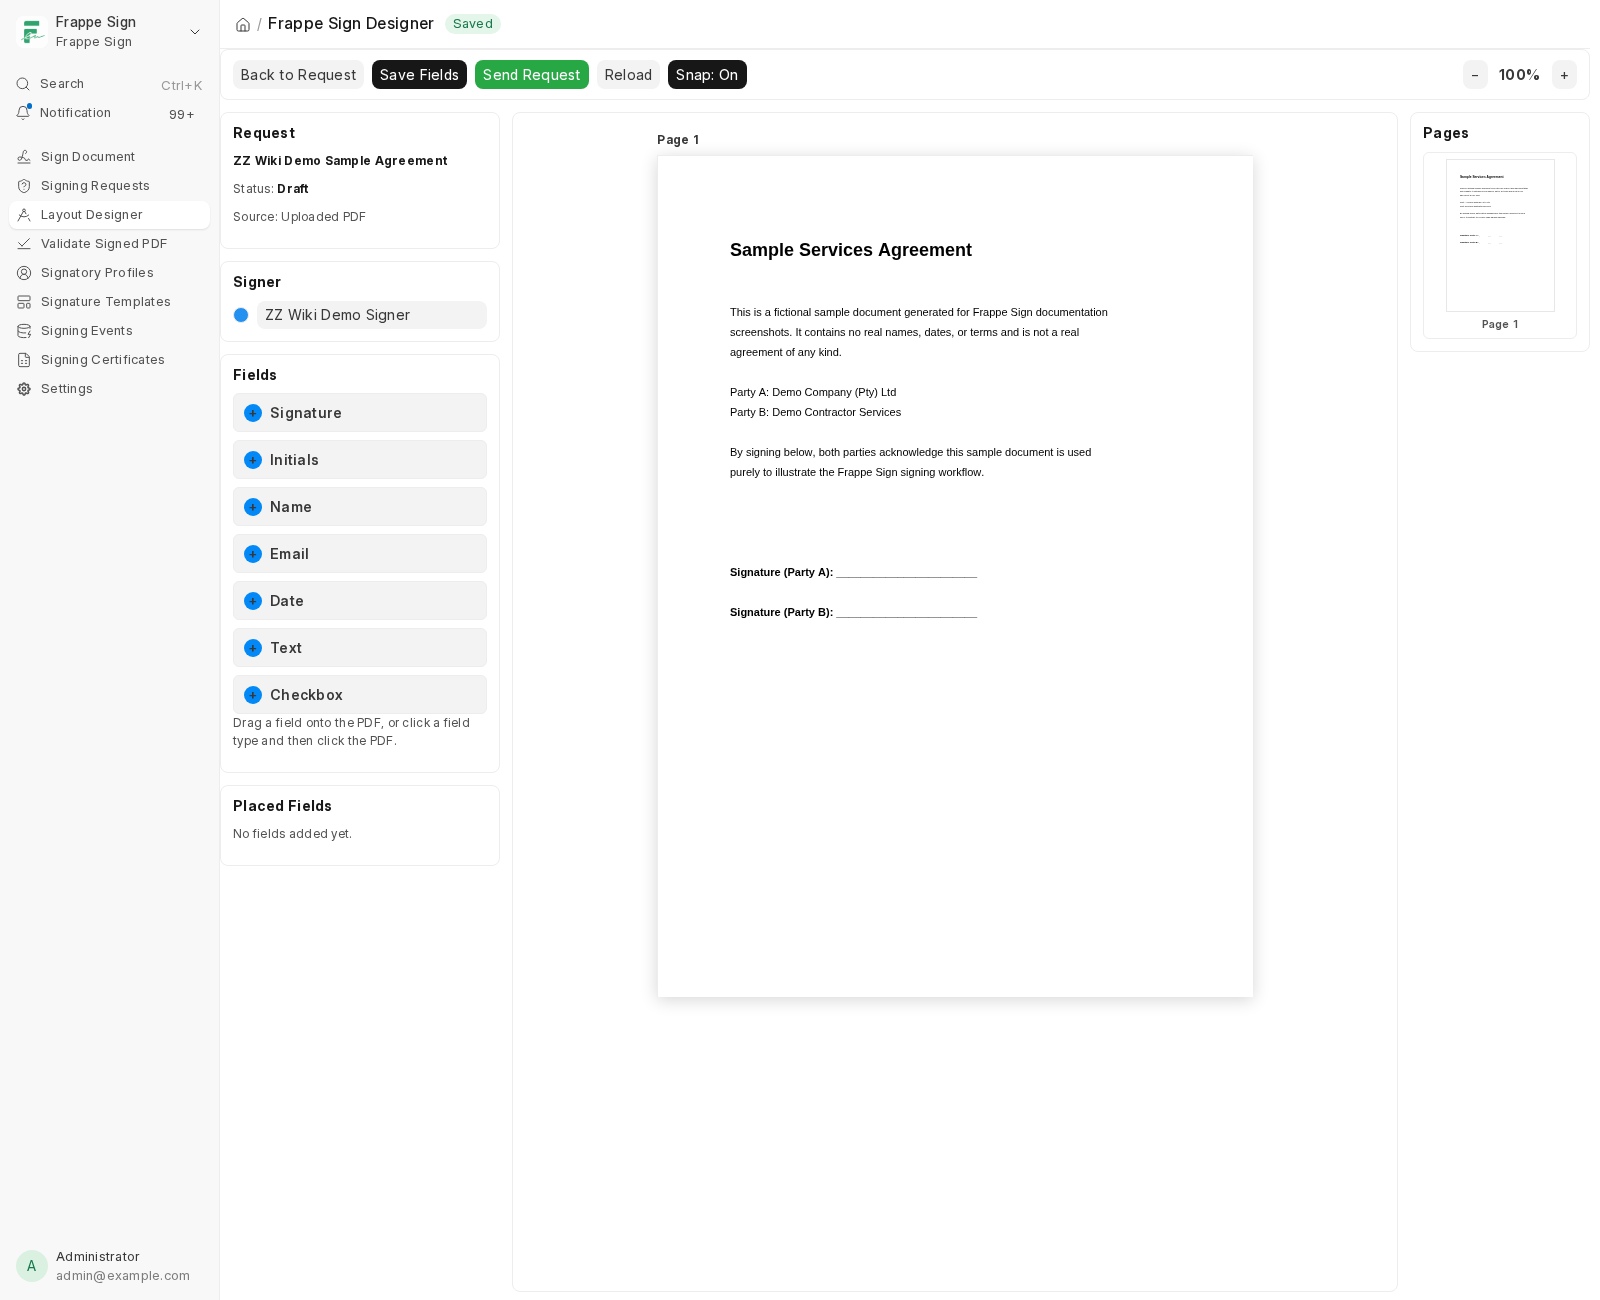
Placing a field
- Pick a signer from the Signer panel (for requests with more than one signer, whichever signer is selected is who a newly-placed field gets assigned to).
- Click a field type in the Fields list, then click on the PDF where it should go - or drag it directly onto the page.
- Repeat for every field you need.
Supported field types: Signature, Initials, Name, Email, Date, Text, Checkbox.
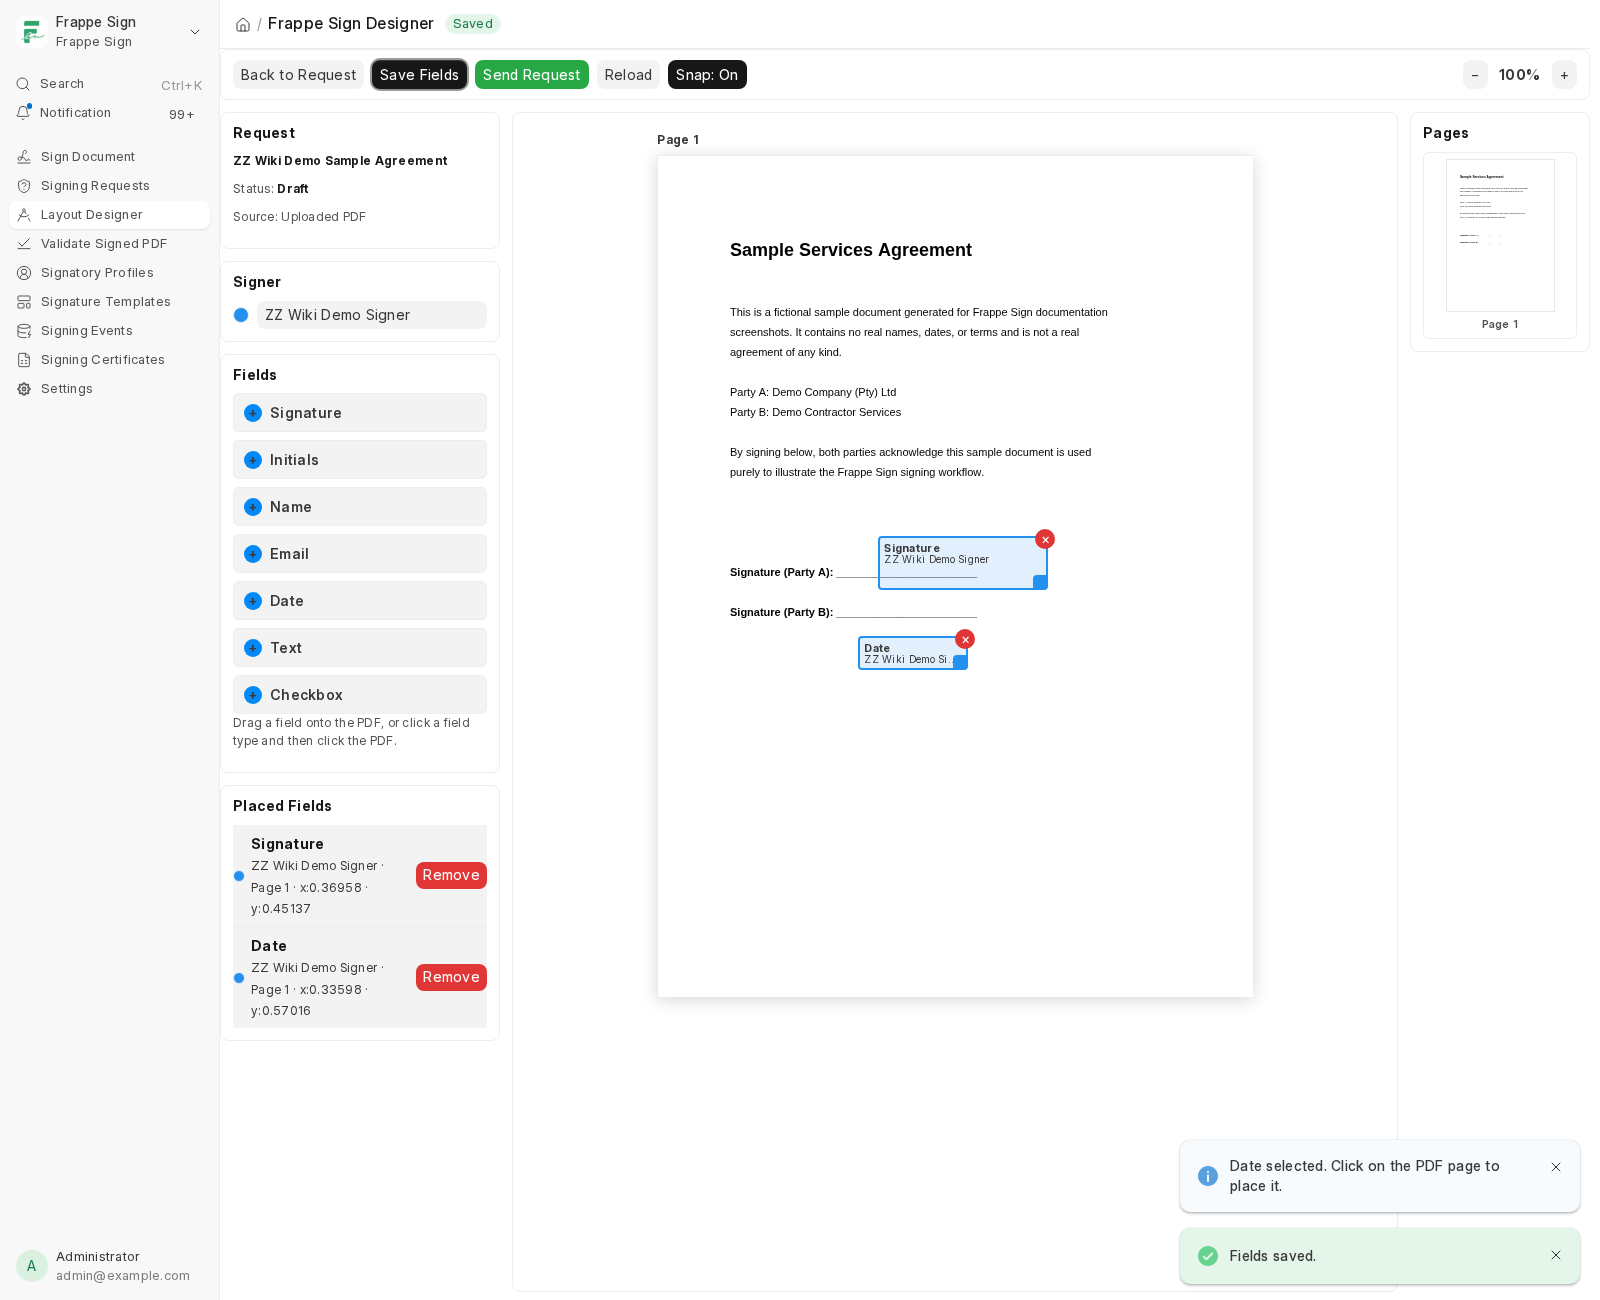
Placed fields show up in the Placed Fields panel with their page and position, and can be removed from there too. Click Save Fields when you're done:
Request mode vs. Template mode
- Opened from a Frappe Sign Request, the Designer works against that request's real signer rows and saves straight to
Frappe Sign Request.fields. The Send Request button lives right in the Designer toolbar here. - Opened from a Frappe Sign Template, it works against the template's placeholder signer labels instead of real signers, and saves to
Frappe Sign Template.fields. You'll be asked for a sample source document just so the PDF can be rendered for placement - that sample is never stored on the template itself. There's no Send button in template mode, since a template isn't a request. See Templates.
Next: send the request - see Sending a Request & the Signing Portal.
Last updated 2 months ago
Was this helpful?